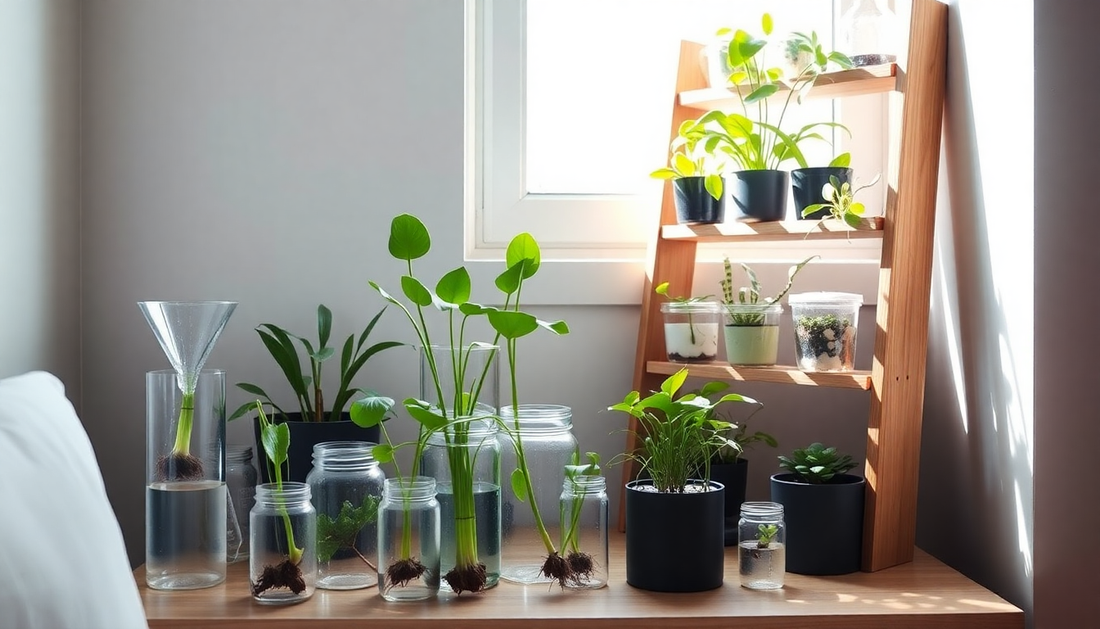
How to Create a DIY Indoor Plant Propagation Station
As an avid indoor plant enthusiast, I'm always on the lookout for ways to expand my collection without breaking the bank. One of my favorite methods is plant propagation - the process of growing new plants from cuttings or offsets of existing ones. Not only is it a cost-effective way to add to your indoor jungle, but it's also incredibly rewarding to watch new life emerge from a single leaf or stem.
In this blog post, I'll walk you through the steps to create your very own DIY indoor plant propagation station. Whether you're a seasoned plant parent or just starting your green thumb journey, this easy-to-follow guide will have you propagating like a pro in no time.
Choosing the Right Plants for Propagation
Not all plants are created equal when it comes to propagation. Some species take to it more readily than others, making the process a breeze. When selecting plants for your propagation station, consider the following:
Best Plants for Cuttings
- Succulents (e.g., jade, echeveria, sedum)
- Pothos
- Philodendrons
- Monstera deliciosa
- Tradescantia (wandering jew)
- Peperomia
- Sansevieria (snake plant)
These plants are known for their ability to root easily from stem or leaf cuttings, making them ideal candidates for your DIY propagation setup.
Best Plants for Offsets
- ZZ plant
- Bromeliads
- Aloe vera
- Snake plant
- Pilea peperomioides
Offset propagation involves separating and replanting the baby plants (offsets) that emerge from the mother plant's base or along the stems. These types of plants are perfect for this method.
Gathering Your Supplies
To create your indoor plant propagation station, you'll need a few basic supplies:
- Clean, sharp scissors or pruning shears
- Small, clear containers (e.g., jars, glasses, or propagation trays)
- Potting mix or well-draining soil
- Water
- Rooting hormone (optional)
- Labels or markers
Having these items on hand will make the propagation process a breeze.
Step-by-Step Guide to Propagation
Cuttings Propagation
- Prepare the Cuttings: Using your clean scissors, take 4-6 inch cuttings from the mother plant, making sure to include at least one node (the point where the leaves or branches emerge from the stem).
- Remove Lower Leaves: Carefully remove any leaves from the lower portion of the cutting, leaving only the top leaves intact.
- Apply Rooting Hormone (Optional): Dip the cut end of the cutting into a rooting hormone powder or gel. This can help stimulate root growth, but is not strictly necessary.
- Plant the Cuttings: Fill your small container with a well-draining potting mix or soil. Make a small hole in the center and gently insert the cutting, ensuring the node is buried in the soil.
- Water and Cover: Water the soil lightly and, if desired, cover the container with a clear plastic bag or lid to create a humid environment. This helps the cutting retain moisture while it develops roots.
- Monitor and Maintain: Place your propagation station in a bright, indirect light location. Check the soil regularly and water when the top inch feels dry. In 2-4 weeks, you should start to see new growth, indicating the cutting has rooted successfully.
Offset Propagation
- Identify Offsets: Examine the base of the mother plant and look for small, baby plants (offsets) that have emerged.
- Gently Separate: Using your fingers or clean scissors, carefully separate the offset from the mother plant, ensuring it has its own roots.
- Pot the Offset: Fill a small container with well-draining potting mix or soil. Plant the offset, burying it up to the base of the leaves.
- Water and Care: Water the soil lightly and place the new plant in a bright, indirect light location. Continue to water when the top inch of soil feels dry.
Troubleshooting Common Issues
While propagation is generally a straightforward process, there are a few common issues you may encounter:
Cuttings Aren't Rooting
- Ensure you're using the right plants for cuttings propagation.
- Check that the cutting has at least one node buried in the soil.
- Make sure the soil is well-draining and the container has adequate drainage.
- Increase humidity around the cutting by covering it with a plastic bag.
- Be patient - some plants can take 4-6 weeks to develop roots.
Offsets are Dying
- Ensure the offset was properly separated from the mother plant with its own roots.
- Check that the soil is well-draining and the container has adequate drainage.
- Make sure the offset is receiving the right amount of light and water.
- Consider applying a diluted liquid fertilizer to provide nutrients.
By addressing these potential problems, you can troubleshoot and get your propagation station back on track.
Caring for Your Propagated Plants
Once your new plants have successfully rooted, it's time to transition them to their permanent homes. Gently remove the cuttings or offsets from their propagation containers and plant them in slightly larger pots filled with well-draining potting mix.
Continue to care for your propagated plants as you would their mother plants, providing the appropriate amount of water, light, and nutrients. With proper care, your new additions will thrive and you can continue to expand your indoor plant collection through the magic of propagation.
Happy propagating!


No comments